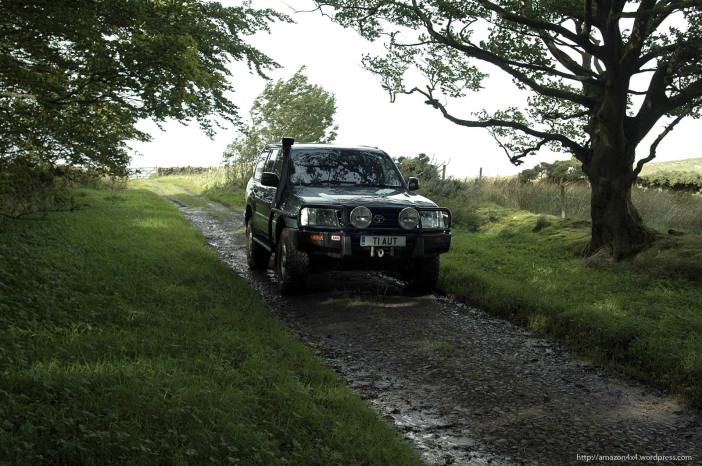
Replace Air-con Condenser on Landcruiser

The Condenser on my Land cruiser has seen better days and  I decided to change it out before the unit fails completely. Aftermarket condensers are very cheap and plenty full to choose from. I had no intention to purchase an original condenser from Toyota as they extortionately expensive.

First step was to remove the ARB Bullbar, Spotlights for better access.

Next step was to remove the oil cooler for the automatic gearbox and the inter-cooler including pipe work. This has also give me the opportunity to maintain the T-max winch, as it was a bit in a bad state but still working.

The condition of the oil cooler is not that bad. I believe I can get a view more years out of it.

A bit of paint and the cooler looks much nicer.

The same with the inter-cooler. A black spray can and everything look much neater.

This was the state of the old condenser, still in working  order but no idea for how  much longer.

This is the new condenser, no doubt Chinese manufactured, but good enough for me. For the cost of an genuine Toyota, I can buy four of this type. The condenser comes with air dryer already attached.

Connecting was strait forward, as the aftermarket unit fitted very well. Just a bolt on job.


Installing the oil cooler and inter cooler was easy.

After recharging,  the air-con system was good as new. I can be sure the system don’t let me down on hot days.

Front Axle Assembly Replacement

The other day while I was checking the LC over I have noticed the inner boot has split open on the right hand site. How long this has been I can not say. I did not noticed anything while driving or any noise coming from it. As the LC has now close to the 150 000 mile my best option is now to change a view more parts which will fail soon ore later.

First step was to remove the steering knuckle with axle hub to access to the drive shaft. Unfortunately I could not get the ABS sensor removed. On the end the cable snapped off behind the sensor. Another expense to add on.

The removal of the drive shaft was very simple. I had just to pull it out. I fitted a new differential oil seal, as it would be false economy to save a view pennies and ending up with a leak after assembling.

The removal and fitting of the inner and outer bearings and races was very easy work with the 20 tonnes hydraulic press.

I installed new upright needle bearing, bronze bush and and inner knuckle seal.

New axle shaft assembly installed.

Original Toyota brake backing plate. The old plate was in a bad state.


Axle hub assembly ready to go back on

New brake disc and pads installed. New hub side snap ring installed. Toyota has different sizes between 1.8mm and 2.8 mm. In my case the one I had fitted perfectly.


Installing Automatic Transmission Filter

Another job which I had planned for some time is the automatic gearbox filter change. It is a fairly easy  to do but can be a bit messy. Cleanness is very important and definitely not recommended on a wet and windy day while doing the job on the drive way as it is by me.  Luckily the LC 100  still has a drain plug which makes it easier.

First job was to drain the transmission oil.  I’m not a believer of leaving this over night as some folk suggest. A couple of hours should do to get most out of it. Before removing the transmission pan it is advisably to use a big tray as after removing the sump, oil will still leaking from the gear box.

When I have removed the pan I have been surprised how clean it was. I thought it will be full of sludge and the magnets covered with metal . The removing of the old gasket material was a pain and has taken a lot of time.

Only a little bit of metal shavings on the magnets, nothing to worry about.

After I have cleaned the old casket from the transmission,  I have fitted the new filter which is connected with 4 bolts.

I have used liquid transmission gasket which is apparently good for 750 Fahrenheit. Probably an overkill. Torqued all the bolt to spec, filled up with new oil and gave the car a good run before checking for any leaks. No problems, everything fine.

Timing Valve assembly installation completed – Land Cruiser Amazon 100, J10

I received the timing valve in the post and of course I head outside to install it to the injection pump.  I could complete the build up in a fraction of the time which took me to dismantle everything. I got a bit worried when I could not start the engine strait away. In fact it took me about 20 minutes to start the motor. The injection pump and pipes have been empty and it took some time to get everything running. I have used the little hand pump on the filter to push the fuel in to the injection pump,  but I’m not sure if this has made a difference.

I took the Land cruiser for a test run and after the engine warm up, it run perfectly. All what I have to do now is to put the bracket clamps on to the fuel line and the 2 covers for the injection pump.

If anyone ever experience the same problem on the Land Cruiser 100 with the HD-FTE engine and the injection pump 22100-1C170 the suction valve or the proper name Valve Assy, Timing  number is 09630-0580 from Denso. This valve can not be ordered via Toyota or Denso. It has to be 3rd party supplier and  I could not get it from Partsouq or Amayama in the UAE.

Can someone spot the mistake what I have made with the assembly?


Checking Valve Clearance on HD-FTE and other small tasks

As I’m still waiting for the new Timing Control Valve, which will be delivered soon, I got time left to do other tasks which I have pushed out far to long. One of those is to check and adjust the valves on the engine. The cylinder head cover No.1 and No. 2 are off and the access is very good.

On the outside of the intake manifold I have noticed a carbon deposits  build up and as it is everything stripped down I changed the gaskets and also cleaned everything up, so good as it gets. I did not bother clean the inlet ports on the head as I don’t want anything going down to the valve seats. On the end I would have to take the cylinder head of to cleaned out. No way.

Timing Control Valve – Land Cruiser 100

As I have mentioned on my previous post I noticed a small leak on the injection pump. Not a lot, but enough so I have to fix the problem.  I checked the pump and noticed the plug for the Timing Control Valve was soaked  in fuel and when the engine is running a trop of fuel came out every 10 seconds or so.

As it is always, the access to the valve is very bad  as it is located on the bottom of the pump. The only way to remove the valve is to dismantle the injector lines, brackets and pump stay.

It took me a long time to remove everything. Some people say it can be done without removing the injector lines but I could not get on to the rear bolts of the pump stay while the lines are in place.

This is the timing control valve or suction control valve which is a DENSO part. The problem is, the fuel is leaking  through the plastic connector which cannot be repaired. Unfortunately Toyota will or can not sell this part. They would rather sell me a new injection pump for an astronomical prize. I could source this valve from a specialist company but it will take some time to get it.

Greenlaning in Northumberland

After all the repairs and modifications of which I have recently done, I wanted to give the Land Cruiser a good test drive to see how he behaved. We took the LC to a mild Greenlaning session in Northumberland with the stunning views and ideal routes.

dsc_8470

Great to take advantage of the weather as the routes won’t be this dry and green for much longer this year.

dsc_8463
Diane really enjoyed her drive in the LC.

dsc_8466


dsc_8497

Even the Highland Cows are interested to see the Land cruiser and Diane or are they just being nosey?

dsc_8503

Land Cruiser 100 fuel tank 2

I’m still waiting for the tank protector to arrive. I have now plenty time to continue on the fuel tank.  I removed all hoses and covers and have taken the sender unit out. I would aspect much more dirt on the strainer. Even the internal of the tank was pretty clean.

DSC_8314

On the next step I have spent a number of hours to clean the outside of the tank from rust. Then I sprayed a couple of layers Dinitrol RC900 rust converter on.

DSC_8339

I had a good opportunity to install the balance pipe which is required for the auxiliary Front runner tank which I planned to install very soon.  Also I have installed all the fittings for the tank and a new strainer for the pick-up pipe.

DSC_8341

After a couple of days to let the rust converter work in to the metal I have painted the outside of the tank with chassis lack a couple of times.

DSC_8436

DSC_8423

At last I have sprayed Dinitrol 3125 HS over the paint which is a corrosion prevention fluid with has an excellent film building properties on open surfaces and leaves a brown,waxy,water repellent film. This, I hope, prevent any further corrosion.

DSC_8437


Land Cruiser 100 Fuel Tank

Since about 3 years I’m planning to remove my diesel tank on the Land Cruiser 100 but never came around  to do it. There was always something else more important.  Now when I have taken the fuel tank out I’m glad it is done and I hope it was not too late. I’m surprised the tank is not leaking as the condition is not good.

DSC_8298

DSC_8299

The under tray or tank protector is so brittle it just has fallen appart when I have removed it. Definitely have to order a new one and new tank straps as well. Now I have to look where I get all the replacement parts.

DSC_8296

New Pedders springs installed on my Land cruiser

The other day when I had my head under the LC I noticed the left hand spring was broken.  Last year I installed new Pedders shock absorbers but never bothered to change the springs as well. The Pedders shocks are heavy duty but I’m not sure if this had anything to do with the broken spring. It seems to me not so long ago when I have installed the Old Man Emu springs but after I have checked the mileage on it, I discovered it was more then 50 000 miles. So they have not performed as badly as the LC is very often heavy laden and used offroad a lot.

DSC_8186

It did not took very long for a new set of Pedders (7845) extra heavy duty springs to arrive and with a pair of Urethane 20mm Coil Spring Insulator which fit perfectly to it.

DSC_8172

The Pedders springs are slightly higher than the OME’s and definitely stiffer but the diameter of the coil is still the same.

DSC_8175

It took a bit an effort to install the new springs as they not compress very well but eventually I have succeeded. Pedders claim this springs are suited for constantly loaded vehicles but I plan to install an auxiliary tank in the near future, this is not an issue for me as Io will have plenty extra weight on the rear axle.

DSC_8195

I hope the pedders coil springs perform so well as the OME’s. Only time will tell.